How to Take Photographs at Sea
01st April 2008
Taking Photographs at Sea
Wildlife photography often requires a degree of planning and preparation to carry out successfully, and the approach you should choose will depend on the animal you are looking for, whether you need the use of a hide in a forest, SCUBA gear for underwater photography, or a bird table for drawing birds to your garden. As you can probably tell, my passion is marine photography, and this often takes me out to sea on boats of various shapes and sizes. This can provide great a opportunity to get close to a different set of species than is often possible from the land, but also poses a unique set of challenges. In this guide, I will briefly some of the ways you can deal with shooting from boats.
To see more photographs like the ones in this article, have a look at the Seabirds and Marine Mammal galleries.
1. Get your camera set up before you go
The sea is a wet place, and even if you manage to get out on a calm sea with clear skies, you will still find that the air is very humid when out on the water. Since the last thing you want is to fill your camera with salt water or condensation, try to avoid changing lenses on the boat. Taking two bodies is one way around the problem, otherwise speak to the skipper before you set off for an idea of which lens will be best for your trip. Unless you know that the animals will come very close to the boat, it's probably better to err on the side of caution and choose a longer lens. Just make sure you can handhold it comfortably!
2. Set your camera for action
There’s no right or wrong way to set up your camera for a shot, as long as you get the image at the end of it. However, there are certainly some settings on your camera that will make your life easier, most of which centre around making your camera work as fast as it can:
•Spot metering: If your camera has it, this will tell it to meter from the centre 3% (approx) of the viewfinder and will help you get the exposure right for your subject. Alternatively, partial metering is the next best thing (meters for the centre 9% of the viewfinder).
•Continuous focussing (AI Servo on Canons \ Continuous Servo on Nikons): This mode tells the autofocus to track constantly rather than locking on a single point, and is perfect for moving targets.
•High-speed shooting: I think the best way of getting a good action shot is to know your subject and anticipate the behaviour, but this setting doesn’t hurt. Most cameras are able to shoot at least 3 frames per second, and can be really useful in getting the shot you want. It is ridiculously easy to clip the tip of a wing for example, when the bird is flying quickly and the boat is rolling. This mode allows you to take a series of images of a single event and allow you to choose the best ones later.
•Use a fast shutter speed: Do whatever you need to to keep your shutter speed up. About 1/500s or faster is a good shutter speed for birds in flight for example, so use a wide aperture and a higher ISO if you need to.

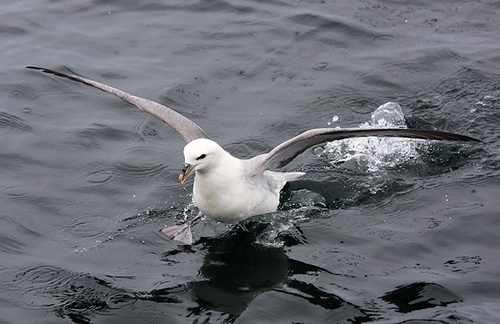
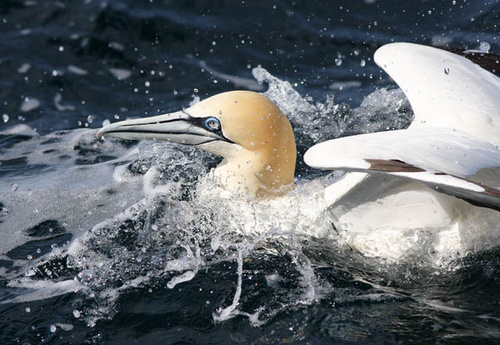
Setting your camera for action will let you take advantage of any close encounters with the wildlife.
•Setting the aperture: In general, I find that using the widest aperture you can is a good rule of thumb when on land as it lets you get your shutter speed up and will give you a lovely blurred background. However, there is so much movement when shooting from a boat that I usually find f8 better as the extra depth of field is enough to keep the subject sharp even if the autofocus can’t quite keep up. The settings you need will depend on your own kit.
•Image Stabilisation: Using a tripod isn’t really appropriate on boats, as they take up too much room, and don’t compensate for the movement of the boat. IS lenses or camera bodies allow you to handhold and get away with slower shutter speeds than you could otherwise use. If you don't have IS, you can try using a monopod and resting the end of it on top of your foot to allow for the boat's movement.
3. Watch the Background!
Because the sea is generally very dark, and the sky is very light by comparison, you will need to pay close attention to your exposure settings depending on whether your subject is framed against the sea or the sky. How you compensate will depend on whether the suject itself is dark (e.g. whales and dolphins, or birds like the skuas and shearwaters) or light (e.g. birds with white plumage). With a bit of practice you'll be able to adjust the exposure as you track without needing to think about it.
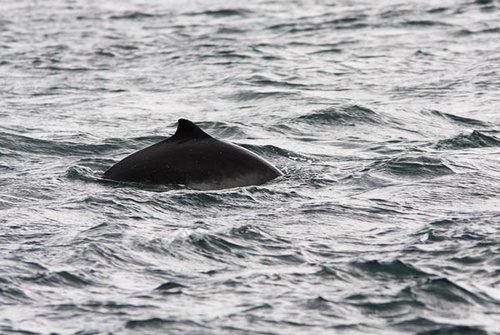
You will need to increase the exposure for dark subjects and decrease it for light ones when shooting against the sea. The opposite is true for shooting against the sky.
4. Know your kit
This is good advice for any photographer really. Photographic opportunities will present themselves all the time, and it is crucial you know how to use your camera instinctively so you can get the shot when you need it.
5.Know your subject
Again, this is good advice for photographing any wildlife. Do a bit of research before you go, so you know which species you are likely to see in an area, what their breeding \ feeding \ sleeping habits are, and obviously, what they look like. Once you’ve done this and headed out on the water, don’t immediately start firing off shots as soon as you see the animals appear. Generally, if you see something once, you’ll see it again (but don't hang about if something amazing shows up!), and sitting and watching it quietly for a little while will help you learn to predict its behaviour around your boat. Birds and mammals tend to follow set patterns of movement, and picking up on this will really help you get the shot you want.
6.Staying still
This is always an issue at sea. Not only are you generally trying to photograph moving animals, you are also doing it from a moving platform. The tips above on kit should help you, but there are some other things to try as well, which are discussed below. However, the most important thing is that you stay safe – if it is too rough for you to easily move around the vessel, it is better to stay seated and indoors than risk falling overboard for the sake of a photograph.
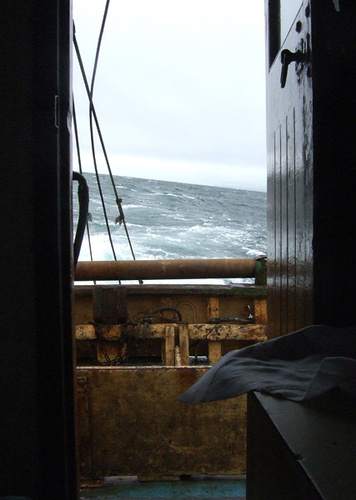
Rough seas and expensive cameras are rarely a good combination...
•Avoid rough weather: Not only will you be tossed around less, there is less risk of damaging your gear with salt spray. However, it’s not always possible!
•Brace yourself: If there is some boat movement, it is possible to brace yourself and the camera to try and compensate for it. Keep the camera strap around your neck in such a way that you can drop the camera if you need to (there have been one or two occasions where if I hadn’t dropped my camera, I would have gone over the side). Tuck your elbows in to your sides, and keep one hand on the camera body and shutter release, and the other under the barrel of your lens. Stand with your feet apart and knees bent and use your legs to compensate for the worst of the wave action. Standing at about a 45 degree angle to the waves seems to work pretty well, but it’s something you need to get used to. A good, grippy pair of boots is a must for helping you keep your balance.
•Keep an eye on the sea: Looking through the viewfinder with one eye and keeping the other eye open is a good way of targeting birds with a long lens, but also lets you keep an eye on what the sea is doing and watch out for any particularly big waves that might rock the boat or spray your kit. This takes a bit of getting used to, with each eye showing you totally different things, but definately can help. The last thing you want to do is fall in, so don’t get too engrossed in your camera!
7.Staying Safe
This is absolutely the most important thing. If you are at sea on any vessel in temperate (e.g. UK) waters, the sea temperature is low enough year-round to kill you from hypothermia in a couple of minutes. At the end of the day, it’s not worth falling in the water for a photograph so use your common sense – wear a life jacket, and if there’s any doubt that you might not be able to keep your balance and shoot, don’t shoot.
Like the photographs in this article? Why not have a look at the Seabirds and Marine Mammal galleries for more?
Wildlife photography often requires a degree of planning and preparation to carry out successfully, and the approach you should choose will depend on the animal you are looking for, whether you need the use of a hide in a forest, SCUBA gear for underwater photography, or a bird table for drawing birds to your garden. As you can probably tell, my passion is marine photography, and this often takes me out to sea on boats of various shapes and sizes. This can provide great a opportunity to get close to a different set of species than is often possible from the land, but also poses a unique set of challenges. In this guide, I will briefly some of the ways you can deal with shooting from boats.
To see more photographs like the ones in this article, have a look at the Seabirds and Marine Mammal galleries.
1. Get your camera set up before you go
The sea is a wet place, and even if you manage to get out on a calm sea with clear skies, you will still find that the air is very humid when out on the water. Since the last thing you want is to fill your camera with salt water or condensation, try to avoid changing lenses on the boat. Taking two bodies is one way around the problem, otherwise speak to the skipper before you set off for an idea of which lens will be best for your trip. Unless you know that the animals will come very close to the boat, it's probably better to err on the side of caution and choose a longer lens. Just make sure you can handhold it comfortably!
2. Set your camera for action
There’s no right or wrong way to set up your camera for a shot, as long as you get the image at the end of it. However, there are certainly some settings on your camera that will make your life easier, most of which centre around making your camera work as fast as it can:
•Spot metering: If your camera has it, this will tell it to meter from the centre 3% (approx) of the viewfinder and will help you get the exposure right for your subject. Alternatively, partial metering is the next best thing (meters for the centre 9% of the viewfinder).
•Continuous focussing (AI Servo on Canons \ Continuous Servo on Nikons): This mode tells the autofocus to track constantly rather than locking on a single point, and is perfect for moving targets.
•High-speed shooting: I think the best way of getting a good action shot is to know your subject and anticipate the behaviour, but this setting doesn’t hurt. Most cameras are able to shoot at least 3 frames per second, and can be really useful in getting the shot you want. It is ridiculously easy to clip the tip of a wing for example, when the bird is flying quickly and the boat is rolling. This mode allows you to take a series of images of a single event and allow you to choose the best ones later.
•Use a fast shutter speed: Do whatever you need to to keep your shutter speed up. About 1/500s or faster is a good shutter speed for birds in flight for example, so use a wide aperture and a higher ISO if you need to.
Setting your camera for action will let you take advantage of any close encounters with the wildlife.
•Setting the aperture: In general, I find that using the widest aperture you can is a good rule of thumb when on land as it lets you get your shutter speed up and will give you a lovely blurred background. However, there is so much movement when shooting from a boat that I usually find f8 better as the extra depth of field is enough to keep the subject sharp even if the autofocus can’t quite keep up. The settings you need will depend on your own kit.
•Image Stabilisation: Using a tripod isn’t really appropriate on boats, as they take up too much room, and don’t compensate for the movement of the boat. IS lenses or camera bodies allow you to handhold and get away with slower shutter speeds than you could otherwise use. If you don't have IS, you can try using a monopod and resting the end of it on top of your foot to allow for the boat's movement.
3. Watch the Background!
Because the sea is generally very dark, and the sky is very light by comparison, you will need to pay close attention to your exposure settings depending on whether your subject is framed against the sea or the sky. How you compensate will depend on whether the suject itself is dark (e.g. whales and dolphins, or birds like the skuas and shearwaters) or light (e.g. birds with white plumage). With a bit of practice you'll be able to adjust the exposure as you track without needing to think about it.
You will need to increase the exposure for dark subjects and decrease it for light ones when shooting against the sea. The opposite is true for shooting against the sky.
4. Know your kit
This is good advice for any photographer really. Photographic opportunities will present themselves all the time, and it is crucial you know how to use your camera instinctively so you can get the shot when you need it.
5.Know your subject
Again, this is good advice for photographing any wildlife. Do a bit of research before you go, so you know which species you are likely to see in an area, what their breeding \ feeding \ sleeping habits are, and obviously, what they look like. Once you’ve done this and headed out on the water, don’t immediately start firing off shots as soon as you see the animals appear. Generally, if you see something once, you’ll see it again (but don't hang about if something amazing shows up!), and sitting and watching it quietly for a little while will help you learn to predict its behaviour around your boat. Birds and mammals tend to follow set patterns of movement, and picking up on this will really help you get the shot you want.
6.Staying still
This is always an issue at sea. Not only are you generally trying to photograph moving animals, you are also doing it from a moving platform. The tips above on kit should help you, but there are some other things to try as well, which are discussed below. However, the most important thing is that you stay safe – if it is too rough for you to easily move around the vessel, it is better to stay seated and indoors than risk falling overboard for the sake of a photograph.
Rough seas and expensive cameras are rarely a good combination...
•Avoid rough weather: Not only will you be tossed around less, there is less risk of damaging your gear with salt spray. However, it’s not always possible!
•Brace yourself: If there is some boat movement, it is possible to brace yourself and the camera to try and compensate for it. Keep the camera strap around your neck in such a way that you can drop the camera if you need to (there have been one or two occasions where if I hadn’t dropped my camera, I would have gone over the side). Tuck your elbows in to your sides, and keep one hand on the camera body and shutter release, and the other under the barrel of your lens. Stand with your feet apart and knees bent and use your legs to compensate for the worst of the wave action. Standing at about a 45 degree angle to the waves seems to work pretty well, but it’s something you need to get used to. A good, grippy pair of boots is a must for helping you keep your balance.
•Keep an eye on the sea: Looking through the viewfinder with one eye and keeping the other eye open is a good way of targeting birds with a long lens, but also lets you keep an eye on what the sea is doing and watch out for any particularly big waves that might rock the boat or spray your kit. This takes a bit of getting used to, with each eye showing you totally different things, but definately can help. The last thing you want to do is fall in, so don’t get too engrossed in your camera!
7.Staying Safe
This is absolutely the most important thing. If you are at sea on any vessel in temperate (e.g. UK) waters, the sea temperature is low enough year-round to kill you from hypothermia in a couple of minutes. At the end of the day, it’s not worth falling in the water for a photograph so use your common sense – wear a life jacket, and if there’s any doubt that you might not be able to keep your balance and shoot, don’t shoot.
Like the photographs in this article? Why not have a look at the Seabirds and Marine Mammal galleries for more?