How to Photograph Birds in Flight
02nd April 2008
In: Location Reviews
Photographing Birds in Flight
A flying bird is probably one of the most challenging subjects you can try and photograph, and will require an enormous amount of patience to get good results. However, there are a few tricks and techniques that I have found make the process easier, and I hope they will be of some use. Before you go, make sure your camera is set up for action shots - have a look at 'Photography Guide: Taking Photographs at Sea' for an explanation of how to do this.
For more birds in flight photographs, have a look at the Seabirds and Shorebirds galleries.
1. Research your subject: You don’t need to predict exactly what species you’ll see on your trip, but it helps to have a rough idea as this will have a bearing on the best kit to take with you. Learning as much as you can about the general habits of the bird you want to shoot (e.g. preferred habitat, what it feeds on, what time of day it is most active) will also help you predict what they will do and where they will most likely be when you do get out into the field. Knowing the size of the bird, and how close they are likely to come to you are also aspects worth considering when picking your equipment. You may only need a short lens to photograph gulls flying around a seaside town for example, but will require a much longer one to photograph small finches in a forest.
2. Know your kit: Birds in flight obviously tend to move very quickly, and you’ll need to be able to adjust your camera settings rapidly to keep up and make sure you get the shot.
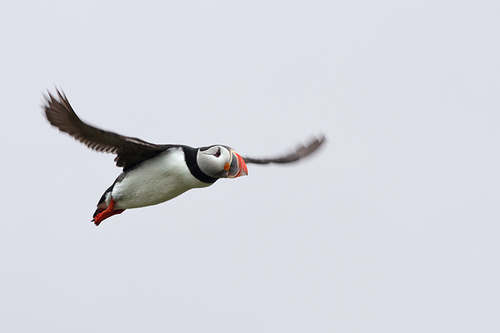
Puffins are fast, and difficult to predict in flight so make sure your kit is ready to cope!
In the Field
1. Choose your spot: How far you can do this will depend on where you are shooting, and whether you have to stay in a static public hide (as is the case in some nature reserves for example) or whether you have the freedom to move around. Before you get too comfortable in one spot however, it’s well worth having a walk around to find the place that will give you the best light and a good background, as well as a good view of the birds you are wanting to photograph. It’s no use taking the perfect in-flight shot if you get home to find that the background is too busy and taking all the attention away from the bird.
2. Watch: Unless an amazingly rare species pops up or something fantastic is happening, it’s worth spending a bit of time just watching the birds fly. Get used to their flight patterns and the general paths they are taking before you put your eye to the viewfinder. A little bit of patience early on will mean you are in a much better position to predict when and where you are likely to get the shot.
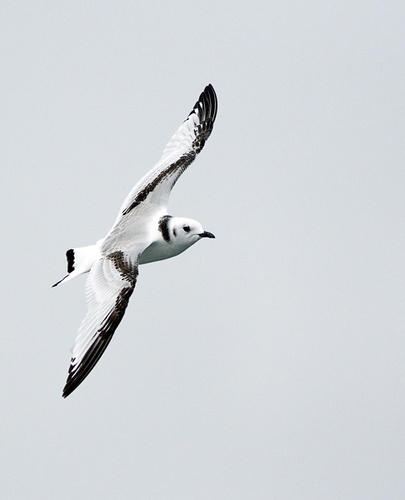
Kittiwakes are great birds to practice on, as they will more or less follow a set path behind a boat, flying in a looping figure of eight.
3. Be aware of the whole scene: When you are totally focussed on a bird in your viewfinder, making sure it is in the frame, in focus and looking lovely, it is very easy to forget the rest of the frame, and what is happening in the background, or to the light levels. If you shoot using one of the semi-automatic settings like aperture or shutter-priority, the camera should make allowances for any changes in the light, but you have to be aware of changes in the background that will confuse it. For example, when shooting seabirds, they quite often swoop and dive around the boats, meaning that the background is constantly changing between a dark blue sea, and a bright, (though usually grey) sky. It is very easy to get the exposure of the bird wrong as a result, and you need to be prepared to keep adjusting the exposure even as you are panning after the bird.
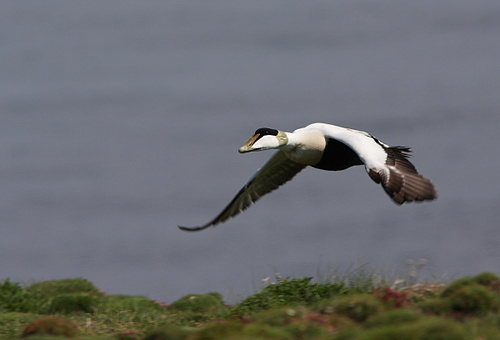
Choosing an background that is free of clutter and distractions will help make an image more eye-catching
4. Finally, practice, practice, practice! This is absolutely the most important thing you can do. Once you know your camera and subject, there is nothing better than getting out and practising with them.
Like the photos in this article? Why not have a look at others in the Seabirds and Shorebirds galleries?
A flying bird is probably one of the most challenging subjects you can try and photograph, and will require an enormous amount of patience to get good results. However, there are a few tricks and techniques that I have found make the process easier, and I hope they will be of some use. Before you go, make sure your camera is set up for action shots - have a look at 'Photography Guide: Taking Photographs at Sea' for an explanation of how to do this.
For more birds in flight photographs, have a look at the Seabirds and Shorebirds galleries.
1. Research your subject: You don’t need to predict exactly what species you’ll see on your trip, but it helps to have a rough idea as this will have a bearing on the best kit to take with you. Learning as much as you can about the general habits of the bird you want to shoot (e.g. preferred habitat, what it feeds on, what time of day it is most active) will also help you predict what they will do and where they will most likely be when you do get out into the field. Knowing the size of the bird, and how close they are likely to come to you are also aspects worth considering when picking your equipment. You may only need a short lens to photograph gulls flying around a seaside town for example, but will require a much longer one to photograph small finches in a forest.
2. Know your kit: Birds in flight obviously tend to move very quickly, and you’ll need to be able to adjust your camera settings rapidly to keep up and make sure you get the shot.
Puffins are fast, and difficult to predict in flight so make sure your kit is ready to cope!
In the Field
1. Choose your spot: How far you can do this will depend on where you are shooting, and whether you have to stay in a static public hide (as is the case in some nature reserves for example) or whether you have the freedom to move around. Before you get too comfortable in one spot however, it’s well worth having a walk around to find the place that will give you the best light and a good background, as well as a good view of the birds you are wanting to photograph. It’s no use taking the perfect in-flight shot if you get home to find that the background is too busy and taking all the attention away from the bird.
2. Watch: Unless an amazingly rare species pops up or something fantastic is happening, it’s worth spending a bit of time just watching the birds fly. Get used to their flight patterns and the general paths they are taking before you put your eye to the viewfinder. A little bit of patience early on will mean you are in a much better position to predict when and where you are likely to get the shot.
Kittiwakes are great birds to practice on, as they will more or less follow a set path behind a boat, flying in a looping figure of eight.
3. Be aware of the whole scene: When you are totally focussed on a bird in your viewfinder, making sure it is in the frame, in focus and looking lovely, it is very easy to forget the rest of the frame, and what is happening in the background, or to the light levels. If you shoot using one of the semi-automatic settings like aperture or shutter-priority, the camera should make allowances for any changes in the light, but you have to be aware of changes in the background that will confuse it. For example, when shooting seabirds, they quite often swoop and dive around the boats, meaning that the background is constantly changing between a dark blue sea, and a bright, (though usually grey) sky. It is very easy to get the exposure of the bird wrong as a result, and you need to be prepared to keep adjusting the exposure even as you are panning after the bird.
Choosing an background that is free of clutter and distractions will help make an image more eye-catching
4. Finally, practice, practice, practice! This is absolutely the most important thing you can do. Once you know your camera and subject, there is nothing better than getting out and practising with them.
Like the photos in this article? Why not have a look at others in the Seabirds and Shorebirds galleries?